Monday, February 20, 2017

Spring Maintenance Checklist

Like many of us, homes need a tune-up after the long winter months. Everything from the roof to the sump pump needs a once-over after the season has taken its toll. To help you cover all the bases, we’ve come up with a handy spring-maintenance checklist. Consult it every year and your home will thank you.


Inspect Brickwork and Stucco

Spalling is a chipping or popping away of a brick’s face, leaving the brick’s interior susceptible to moisture and crumbling. Look for this and any deteriorated mortar that typically occurs on older homes.


Is your brick plagued with efflorescence, those unsightly white deposits caused by soluble salts left behind during water evaporation? The Brick Industry Association recommends dry brushing in warm, dry weather to remove it.
If you discover water penetration in brick, consider sealing the brick with an appropriate sealant.

Replace Rotted Siding or Trim, and Repaint as Necessary

Repainting siding or trim is often more than a one-weekend project. For color consistency, you just can’t just touch it up—you need to paint a whole section.

Clean Gutters and Downspouts

Make sure gutters and downspouts direct water away from the house.


If you live in a place where there’s a lot of freezing and thawing, gutters will expand and contract, so make sure they’re flush to the roof, with no sags or dips.
Get a professional cleaning if you live in a two-story house. Do-it-yourselfers will be safer cleaning a ranch home.


Consider installing gutter guards.

Inspect Your Roof

Shingles that curl (turn up) and claw (turn down) can make your roof inefficient and susceptible to leaks. Call a minimum of three roofers before committing to one for repairs. You’ll educate yourself in the process and end up with a better deal.
Get a Chimney Checkup


Have a professional chimney sweep clean and inspect your active or decorative chimney. Professionals should also check the chimney flue and cap for cracks or leaking.
Don't Overlook Your Attic


Check your attic for proper ventilation and birds’ nests.
Look for obstructions over vents, damaged soffit panels, roof flashing leaks and wet spots on insulation. Keeping a good airflow will save you when it comes to cooling costs.

When you’re rooting around, wear long sleeves and gloves to protect yourself from insulation.


Check Your Heat/Air Unit; Change Batteries in Detectors


Change filters and clean the air purifier as needed.
Have your ducts professionally cleaned. It’ll make your indoor air quality healthier and your furnace more efficient.


Change batteries on smoke and carbon monoxide detectors.
Prune Landscaping and Create Good Drainage


Shrubs and landscaping help against soil erosion and should be planted to form a negative grade, which means water will flow away from the house.
Give Concrete a Little TLC


Seal and inspect asphalt or concrete driveways. Most of us put off sealing driveways until the fall, but the spring is an ideal time to do it. The sealer you use, the driveway material and climate will affect how often you need to seal your driveway.
Power-wash concrete patios, and inspect decks for rotting wood and secure railings. Seal both if necessary.


Have a professional service your pool.
Weatherproof Windows and Doors

Remove interior storm windows (old homes only) and replace screens on clean windows and doors. If you don't have air conditioning, you want to make sure you have good airflow throughout the home. You can also save on utility bills by adding blinds to windows that face south and west. Open windows when the sun sets and closing them at sunrise.

Examine putty and caulk lines around exterior windows and doors, and ensure that weather stripping creates a good seal.


Don't Forget the Sump Pump


Make sure the sump pump is operating correctly, and install a battery backup pump. The backup, another pump that floats above the original pump, will kick on when the electricity goes out. If your sump pump fails, an alarm goes off, letting you know the backup is working. A few hundred dollars will save you thousands in water damage.

Maze Lumber is dedicated to providing our customers with superior service.


Don't forget!!!
Like us on FacebookFollow us on TwitterCheck us out on Instagram!


MAZE LUMBER
1100 Water Street
P.O. Box 449
Peru, IL 61354
Phone: 815-223-1742
Fax: 815-223-1752

Hours:


Monday-Friday: 7:30AM - 4:30PM
Saturday: 8:00AM - 12:00Noon
Sunday: Closed

Thursday, February 9, 2017

10 Important Tips For Insulating Walls

Get the most energy efficiency from your insulation by filling all gaps, avoiding compression, sealing holes in framing and other expert tips.


Cut Fiberglass Batts to Exact Widths

It’s easy to insulate your walls with fiberglass insulation (at least when they’re open!),
but the job still requires attention to detail to get the maximum benefit. Every gap and compressed
batt leaves a path for heat or cold to escape.
Measure and cut the fiberglass batt for an exact fit. Add about 1/4 in. to the measurement
to ensure a snug fit. Use a 4- to 6-in.-wide board or strip of plywood as a straightedge to guide
your utility knife. Line up the edge of the board at the proper width, compress the insulation and
cut it with a sharp utility knife. A scrap of plywood under the batt will protect finished floors and
keep the blade from dulling on concrete.


Avoid Stuffing

Don't stuff full-width batts into spaces that are too narrow. Crumpling batts to fit narrow spaces
creates uninsulated air pockets. And packed insulation has a lower R-value.


Wear Protective Equipment

 Protect your skin, eyes, and lungs when you're working with fiberglass. Goggles, gloves, a dust mask, a cap, and long sleeve coverings protect you from fiberglass irritationIf you'r installing alot of it, consider wearing disposable coveralls.


Seal Narrow Gaps with Foam

Seal around window and door jambs with expanding spray foam. The main purpose of the spray
foam is to seal the space around the window to prevent air infiltration. Use foam that's labeled for window and door insulating. This "minimal-expanding" type reduces the chance of warping the jamb.
If there's still space around the window after the foam cures, lightly stuff the remaining space with strips of fiberglass insulation.


Notch Batts Around Electrical Boxes


Cut notches in batts to fit snuggly around electrical boxes. Airtight boxes have gaskets
that seal against the drywall. Put the batt in place, and use a scissors to snip around the box.
Tuck the snipped-out plug of insulation behind the box. Don’t wrap fiberglass batts around
electrical boxes or stuff full batts behind them.That creates gaps and air convection routes
around the box.


Split Batts Around Cables and Pipes


Split apart the batts to fit around wires and pipes to get the full value of the insulation.
Fiberglass batts have a vertical weave that allow you to easily tear it open for
insulating around electrical cables.


Avoid Stuffing Batts Behind Pipes and Cables

Don't tuck full-thickness batts behind pipes and cables. Compressing the fiberglass
decreases its insulating value and creates voids between the insulation and the drywall.


Plug Holes in Top and Bottom Plates


Plug holes in the top and bottom plates with expanding spray foam.
Even small holes can let a lot of air escape. Don't leave gaps around wires, pipes
or ducts unplugged. These gaps create pathways for warm interior air to leak into the attic,
wasting energy and causing attic condensation or even ice dams in cold climates.


Avoid Paper-Faced Insulation Where Possible

Don't buy paper-faced insulation for standard wall insulating jobs.
The paper facing makes cutting the batts difficult. And it's hard to create a tight vapor
retarder with paper-faced batts.


Buy Friction-Fit Batts

Buy unfaced friction-fit batts and seal the walls with a 4-mil poly vapor retarder.
Seal the gap between the bottom plate of the wall and the floor with acoustical sealant or caulk.
Press the poly into the sealant. Use special airtight electrical boxes (see photo, Tip 5)
or seal the poly to the electrical box with acoustical sealant.
Tape the seams in the poly withsheathing tape.

Saturday, January 14, 2017

6 Reasons to do Home Improvement Projects in the Winter


Many homeowners don’t consider winter as a good time to get home repairs and improvement projects done. Understandably so, as the busy holiday season can be a hectic time for everyone (not to mention the cold, wet weather that comes along with it!). However, the winter can be an ideal time to complete those projects you’ve been sitting on. Not convinced?  Here are 5 reasons winter is the best time to do home improvement projects:


1. Contractor Availability: Because most people do not invest in major home projects during the winter, contractors have increased availability during this time,
making it more convenient for you to schedule a time to meet with them. This also provides for a quicker timeline for your project to be completed, unlike during the busy spring or summer when scheduling construction may be pushed out several weeks, or months!


2. You Have More Free Time: Depending on their occupation, most people have a fair amount of off-time during the holidays. Thanksgiving, Christmas and New Year’s all provide for time away from the office, freeing up time for research, gathering estimates, meeting with contractors, and scheduling construction.


3. Smart Savings: Since business is slower in the cold months, savings can sometimes be found on items like doors, windows, tile, flooring and even lumber. You’d be surprised at the amount of money you can save!


4. Better Clean-up Technology: It may have been the case in the past that doing indoor projects during the winter would lead to a mess in the house. However, today’s technology, such as negative pressure fans and plastic zip doors, will help confine the dust and fumes to the area of the project itself (without interfering with your holiday décor!).


5. Trees are easier to trim: Trees are dormant and leafless in the winter, making it easier to see exactly where on the branch you want to cut. Take advantage of the winter to get rid of those branches that have been blocking your view or encroaching on your house.


6. You Can Make Spring & Summer Plans: With your big home projects behind you, your spring and summer will be wide-open for vacations, house parties, and relaxation! You can enjoy the New Year with the peace of mind that your home improvement projects have been completed!


So if you’re ready to get your home improvement projects completed before spring rolls around, contact Maze Lumber today – we’d be happy to help you out!


Maze Lumber is dedicated to providing our customers with superior service.


Don't forget!!!
Like us on FacebookFollow us on TwitterCheck us out on Instagram!

MAZE LUMBER
1100 Water Street
P.O. Box 449
Peru, IL 61354
Phone: 815-223-1742
Fax: 815-223-1752

Hours:


Monday-Friday: 7:30AM - 4:30PM
Saturday: 8:00AM - 12:00Noon
Sunday: Closed

Tuesday, January 10, 2017

Advantages and Disadvantages To Exterior Doors


So you’ve decided you’re ready to buy new exterior doors for your home. But you’re having a hard time figuring out which type of door you want. That’s where Maze Lumber can help!. We're here to give you some of the basic facts you should know when you go to purchase a door.
There are three common exterior doors you can choose from: fiberglass, steel or wood. Each type of door has its advantages and disadvantages.

EXTERIOR FIBERGLASS DOOR

Let’s start with fiberglass doors. Fiberglass doors are energy efficient. These doors offer up to four times the insulation that wood offers. They also require minimal to no maintenance. These doors won’t warp or deteriorate over time like wood can. They also aren’t going to dent or rust as a steel door might. Some people choose not to buy fiberglass because they want the authenticity that wood offers. However, you can order your fiberglass door with a wood grain or smooth finish. Then the doors can be stained or painted. One disadvantage of fiberglass doors is the cost. Fiberglass exterior doors can be double the price of a steel door. Once people hear the price, they sometimes shy away from purchasing.

EXTERIOR STEEL DOOR

Speaking of steel door, they are the next option on our list today. Just like fiberglass doors, they too are energy efficient. However, they aren’t as efficient as fiberglass but they offer good insulating value. Depending on your environment or location, they require less maintenance. Steel doors don’t do well near the water. We wouldn’t recommend them for anyone with waterfront property because they will rust overtime from the moisture. Steel doors can easily be dented as well as scratched. They can be painted, but not stained. Steel exterior doors are not available with a wood grain; they all come with a smooth finish. Their big advantage is they are far less expensive. It’s still a great quality door for about half the price.

EXTERIOR WOOD DOORS

Last, but certainly not least, are beautiful wood doors. Wood doors are seriously hit or miss. People love them because they can give your home that “high-end look.” Like we stated before about wanting authenticity, you can’t get more genuine than with real wood. Wood doors are warm and inviting. People love their natural beauty and are easily drawn to wood doors. If scratched, wood doors are easy to repair because you can simply sand it down and re-finish it. However, wood doors definitely have their disadvantages as well. They require regular maintenance. The finish on a wood door will fade over time. Usually, people who purchase a wood door are told to refinish the door every 1-2 years. Here at Maze Lumber, we also recommend people to consider some sort of overhang to protect the door from precipitation. Wood doors easily absorb moisture and this can cause the door to warp or rot. They are also the least energy efficient out of the three types and can also be very expensive.
Now that you know some facts about exterior doors, come in a take a peek at what we have to offer. We know all doors have their advantages and disadvantages. Ultimately the decision is yours. Take all of these pros and cons into consideration when you go to look for a new door.

Maze Lumber is dedicated to providing our customers with superior service.


Don't forget!!!
Like us on FacebookFollow us on TwitterCheck us out on Instagram!

MAZE LUMBER
1100 Water Street
P.O. Box 449
Peru, IL 61354
Phone: 815-223-1742
Fax: 815-223-1752

Hours:

Monday-Friday: 7:30AM - 4:30PM
Saturday: 8:00AM - 12:00Noon
Sunday: Closed

Wednesday, January 4, 2017

8 Home Remodel New Year’s Resolutions


Check your home’s safety

Review your home for safety basics such as carbon monoxide detectors, fire hazard prevention, places for common falls, etc. Don’t hesitate to call in a professional when you need to!
Become more energy efficient
Whether this means using less heat or upgrading your appliances, aiming for an energy efficient home means you lower your bills and reduce your carbon footprint. Who could ask for more? A few energy efficient improvements:
  • Low-pressure shower heads
  • New washer/dryer
  • Check windows and doors for drafts
  • Insulate
  • Low-flow toilets
  • Energy-efficient light bulbs
  • Programmable thermostat – adjust the temperature when you’re at home vs. away. You can control thermostats from your smart phone and return the temperature to a comfortable level before you even return home.
  • Check HVAC system and fix bugs
Overhaul the room nobody uses
Most houses have one of these rooms – it’s pristinely decorated, but it never gets touched. You can’t even remember the last time you sat on the couch. You don’t need to let that valuable square footage go to waste. Find a way to revamp the room and make it useful. Whether you transform its purpose or knock down a wall to expand the room next door, you’ll be grateful for the change.
Start building a home improvement budget
Depending on the size of the project, your home improvement project may cost a few bucks. Start budgeting for your dream home now, so you don’t have to cut any corners in the future.
Build better storage
Stop tripping over stray toys and digging for that missing mitten. Make a small investment in great home storage solutions (think: hidden shelving, improved entryway, new shed) and save yourself more than a few headaches.
Invest in the things you love
When do you feel the most at peace in your home? Is it sitting on the porch? Relaxing in a bubble bath? Watching movies with your family? Identify your favorite home activities, and build out that part of your home. Refinish your deck, remodel your bathroom, or finish your basement as a movie theater. When the space is more available to you, you are more likely to make use of it.
Pay attention to the details
Spend a month building up a list of small home improvements. Keep an eye out for problems such as grungy outlet covers and chipped window paint. At the end of the month, divvy up the tasks and devote the next month to getting them all done. These small projects shouldn’t take too long to complete, and they will make a huge difference in your home. This Old House made a handy list of potential fixes for your home.
Pick a pet project
Focus your year on one big home improvement project. Devote the year (or just a part of it) to research, planning, and pricing. By taking the extra time, you ensure you will plan for a project that you’ll love in the long term, and you will be more prepared for common hiccups and even be able to avoid them. Your researching planning can include Pinterest boards, drawing inspiration from friends’ homes, heading to your local home improvement store, vetting potential contractors, and setting a realistic budget.

Wednesday, December 7, 2016

Must-Know Safety Tips for Hanging Holiday Lights


It’s almost Christmas, which means it’s time to decorate for the holidays! Before you grab a ladder and head to the roof, keep in mind health care professionals treat approximately 13,000 people each year due to injuries sustained from holiday decorating mishaps. 
As specialists in building supplies, decks, patios, and porches, Maze Lumber understands how dangerous hanging holiday decorations can be. Luckily, you can improve your safety while decorating with these tips.

Safety Tips For Holiday Decorating


Christmas Trees

No matter where you place your family’s Christmas tree, it should be positioned away from fireplaces and radiators. Heated rooms tend to dry out live trees faster, so keep the stand filled with water if you have a live tree. This can cut down on fire risks.

Outdoor Lights

You should only use lights that are labeled for the outdoors, have fused plugs, and have been tested for safety by a recognized testing laboratory. Check the lights for frayed wires, loose connections, and burned-out bulbs. They should only be plugged into grounded outlets or outlets with ground fault circuit interrupters.

Ladders

porches
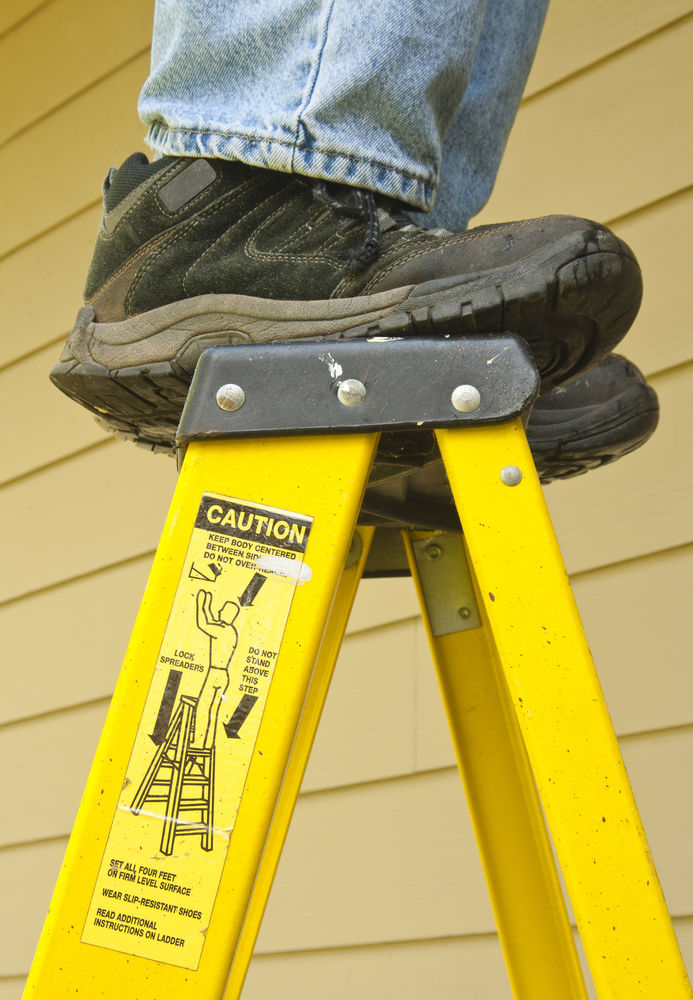
If you want to apply holiday lights to the top of your porch or roof, you’ll probably need a ladder to reach these areas. Make sure you have a person spotting you while you’re adding lights to the roof. They should hold the ladder still while you’re working. 

Porches, Roofs, & Decks

The most common places to hang holiday lights are roof lines, porches, and deck rails. Before you start hammering or attach clips to these places, check to see if there are any visible signs of rotten or decaying wood. Damaged sections of wood can be unstable, causing the lights or wood itself to fall and hit someone. Replace any areas that cause concern.
No matter where you hang your holiday decorations — the porch, along some deck railing, or the roof — always use caution to avoid injury and fire risks.
Call Maze Lumber at (815) 223-1742 or visit us online to find more information about their building supplies and other services. You can also connect with the company on Facebook and Twitter.

Tuesday, December 6, 2016

Prevent Slips & Falls With De-Icers


Dealing with icy sidewalks is a fact of life in northern climates where snow and winter conditions are common. There are many different ways to deal with ice, whether using one of many chemical compounds to melt it or using more environmentally friendly products to provide traction and prevent slippage.

De-icers

How Do They Work?
Ice melt products attract moisture to themselves to form a liquid brine which generates heat and melts ice. The product must reach the pavement to become effective. Once on the pavement the brine can spread out and break the bond the ice has with the pavement. As the ice is loosened, it can more easily be shoveled away.
Kinds of De-icer
Every year there are more and more choices when it comes to de-icers. A lot of the choices are very similar and differ only in marketing with each product claiming to be the best. 95% of all de-icers are made from one, or a blend, of five products. Typically blends are made to try and combine the best advantages of each chemical.
Calcium chloride - This is basically traditional ice melt. It will melt ice to temperatures of -25˚F. It gives off heat as it dissolves which melts the ice quicker but leaves a slimy residue. It is corrosive to metal and can be damaging to vegetation if over-applied. Magnesium chloride is a very similar product and becoming more popular. It is less corrosive and safer on concrete and plants.
Sodium chloride (rock salt) - Rock salt is the least expensive and very efficient. Will melt ice to temperatures of 20˚F. Effective at drying out icy surfaces. Not as harmful to concrete as other products but can be damaging to vegetation and is corrosive to metal.
Potassium chloride - Is more expensive than other products. Works well when mixed 50/50 with rock salt. Will melt ice to temperatures of 12˚F. Relatively safe but can still cause plant injury if over-applied.
Urea - Commonly used as a fertilizer but is also an effective ice melter. Will melt ice to temperatures of 15˚F. Over application can harm vegetation.
Calcium magnesium acetate (CMA) - Is made from dolomitic limestone and acetic acid (main compound in vinegar). It has little affect on plants and concrete but it's performance decreases at temperatures below 20˚F. It works differently than other materials in that it does not form a brine like salts. CMA helps prevent snow particles from sticking to each other on the road surface. It prevents re-freezing more than it melts ice and tends to leave a slush.
Are They Harmful?

Given the alternative of dangerous conditions, the benefits can outweigh the potential disadvantages. All de-icers have the potential to damage vegetation, concrete, and corrode metal. Moderate use combined with adequate rainfall to dissolve and wash away product should be enough to protect vegetation and hard surfaces. Damage to concrete occurs not from the effects of the salt but from the effects of the freezing point of water. When the freezing point of water is lowered (by creating a brine), the number of freeze/thaw cycles increases and the expansion of freezing water (hydraulic pressure) can exceed the strengths of concrete.

Natural Alternatives

Other, more natural, products can be used to treat icy sidewalks and driveways. Although they are generally less effective, they pose less harm to the environment and pets. Natural alternatives like sand, sawdust, wood shavings, and kitty litter are mainly effective for their gritty, anti-slip qualities. They provide better traction to walk on the ice but do not actually melt ice. They are often mixed with ice melt products as a way to use less chemicals.

De-icer Precautions

  • Do not over apply, follow instructions on the label.
  • Do not try to melt everything. Clear snow first.
  • Wear gloves. Ice melts are an irritant.
  • Do not use on new concrete that has not fully cured.
  • All products have some effect on the environment. Flush area with water if over-use is suspected or damage appears on plants.